From street car to race car in several, uh, “easy” steps
I never meant for this to happen… no, really. All I did was start taking my street car to high-performance driving events, eventually decide that I should buy a cheap-but-sporty car that I wouldn’t mind rattling around the track, and the next thing I knew I was trying to build a race car before the season started.
Prologue: I shouldn’t have gone to the races…
In late August of 2002, I went to my first club race as a spectator. I knew of an acquaintance that would be there, and I thought I might run into another guy I’d met at the track, but I didn’t have any expectations about the event itself. What I found was an odd mix of very expensive, purpose-built race cars and super-low-budget production cars, a surprisingly family-oriented atmosphere… and some terrific racing! Although I’d sort of idly entertained the idea of someday going racing myself, I knew how expensive it was and, with a baby on the way and a hefty mortgage to deal with, I wasn’t planning on doing anything about it anytime soon. That week-end, though, changed everything. Whether it’s my competitive nature, too many years of “armchair racing,” or just how much fun it looked, it was pretty clear within a few weeks where all my discretionary income was about to go…
Phase 1: Buy the car
The first step in this process is, of course, to buy a car. Now, many people told me this, and I believed them, but I’ll say it again here in the hope that others won’t make the same mistake: Buy a car that’s already been race-prepared. Not only is it a lot less work, it’s shockingly more cost-effective.
On the other hand, if you feel you must build it yourself, you’ll also know a lot more about the car than if you buy a race car or have someone strip it and build it up for you. You’re more likely to know (at the track) when something is not quite right and more likely to be able to fix it. And since you’ll understand how all the parts of the car work together, you might even be better at setting it up for different tracks or conditions. (Building a car for a low-end “spec” class like Spec Miata can still help you avoid a lot of frustration and potential costs, since you’re building a car to a specification and in a category that’s, by design, supposed to be cheaper.)
In my case, I had decided that I wanted to race a mid- to late-’80s BMW 325 in the SCCA’s Improved Touring class. It’s a popular car in a popular class and I knew lots of people that either owned or raced an “E30” 325. In fact, I even had a line on a really well-prepared 325is, but it wasn’t even remotely street-legal anymore. I didn’t see any way I could afford to buy it, a tow vehicle, a trailer, and all the associated bits (race suit, helmet, etc.) that I’d need, so I decided to build up my own. (In hindsight… well, never mind.)
A funny thing happened on the way to buy an E30, though: The newest of these cars I was looking at was nearly 13 years old; many were closer to 17. Aside from any consideration about the fact I was going to be driving this car pretty hard, I didn’t know how quickly I’d be able to replace various stock parts with “go-fast” bits. So I decided to take a step back and reconsider which car I should get, which ultimately resulted in the selection of a 1997 Acura Integra GS-R. But wait, you say, that’s a 4-cylinder, front-wheel drive car. What happened to a torquey 6-cylinder and RWD? Good question.
The whole point to the re-evaluation was that I wanted something that was relatively new, but also reasonably priced. I wanted something that I could race in roughly the same classes as the Bimmer. I wanted something that was capable of some decent performance, but that—due to the increased cost of the car itself—wasn’t going to be ridiculously expensive to modify. Although it’s FWD, the Integra has no torque steer (benefits of equal-length half-shafts) and FWD is actually something of a handling bonus, considering the amount of rainy days we experience here in the Pacific Northwest. And I also looked to the experience of the RealTime Racing team in the SPEED World Challenge Touring Car series, who had a driver’s champion 6 years running in a class that includes some very racy BMWs.
Phase 2: Strip the car
The second step of the process was to get all the extra bits out of the interior. Not only does this mean removing stuff like the seats and stereo, but ALL the interior trim pieces, including the carpeting and roof liner. Buying an official shop manual for your car is advisable at this point, since the good ones contain detailed information about how to get all this stuff out. (You’ll eventually need one anyway, so you might as well get it early.) One advantage to Japanese cars is they’re pretty easy to work on, and I guess this applies to interior pieces, too: Although I had stripped the interior before the shop manual arrived, I somehow correctly guessed all the relevant procedures.
(Another piece of advice, if you’re building your own car, is to get absolutely as much of the work done over the winter as possible. Once track season starts, scheduling time for stripping/building gets that much more difficult.)
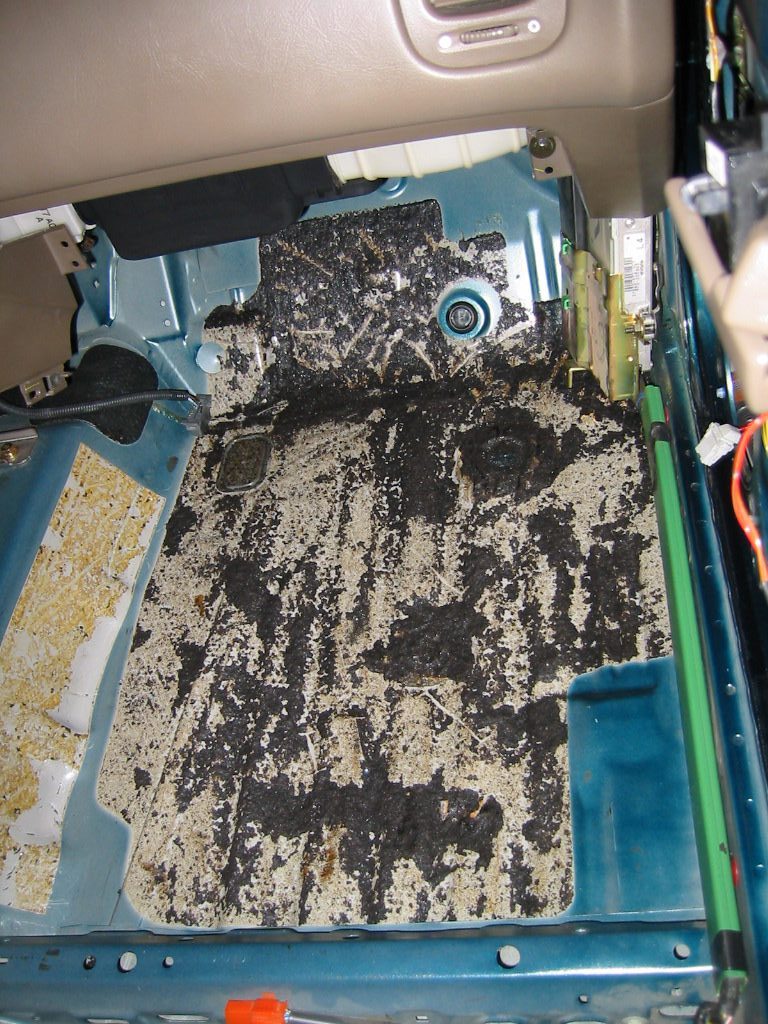
The only truly annoying part of this process was removing the evil sound-deadening insulation that’s sprayed on (and, in some places in my car, glued AND sprayed on) the floor of the car. It’s sort of like hard tar, and you can probably imagine how difficult it is to remove. Michael Lord, local racer and driving instructor, suggested the following (which I first heard about from Sage Schreiner, writing in our chapter newsletter of the BMW Car Club of America): Get dry ice from the seafood department of your local store. Set a chunk of it on the insulation for a while and then, once it’s nice and cold, start beating on it with a rubber mallet. (I also used a screwdriver to help chip it up.)
For the most part, this worked pretty well. Under the driver’s and passenger’s seats, unfortunately, the insulation was much thicker and also of a different consistency. Where the stuff in the rest of the car mostly came off in sheets, this crap flaked off in granules. AND left a lot of goo behind, as you can see from the picture on the left:
Based on the information I received after the weight balance (described below), it appears that I stripped nearly 350 pounds out of the car! Holy cow…
Phase 3: Prepare the car
The third step in this process was to start making performance-related changes. The plan was (notice the past tense… <sigh>) to slowly spend money on modifications that would provide noticeable improvements to the car, while still being somewhat cost-effective. I was going to start with my interfaces with the car (seat, steering wheel, pedals) and then move on to the brakes, suspension, and exhaust (in that order), with any engine/driveline-related changes much lower on the list. The thinking here is that there’s way more I can do because of these changes and some experience than I can by going out and spending a ton of money trying to boost horsepower. Somewhere along the way, and before I do anything more than lapping, would be safety-related work like a cage, master kill switch, fire extinguisher, etc.
See a list of what I’ve bought to go racing, updated as I add new things to the car.
Lapping day #1
My first day at the track with the new car was a very rainy March 10th. That was too bad, since it made “feeling out” the car a little harder, but it’s always good to get experience in the rain before you try it in a race. That being said, I had fun and learned quite a few things about the Integra compared to the BMW: Boy, have I lost a lot of torque! 🙂 This meant my upshift points were further down the track than what I’m used to, but speeds on most parts of the track were about the same. Top speed was down to 110MPH, but this car is so amazingly “tossable” (and I brake so much less) that I’m sure it’s going to be a really great race car.
Round 1
As I had never driven the Integra on the track, my first round of modifications was simply to make myself comfortable in a track environment. This meant a race seat, steering wheel, and pedals that would let me heel/toe shift more easily. (Why do Japanese cars all seem to have the accelerator pedal buried way up in the right-hand corner of the footwell, way the hell away from the brake pedal?) Since I had discovered from some unpleasant experience on the street that the OE all-season Michelins sucked for traction, I decided to get my race wheels and tires at this stage, too.
Lapping day #2
Two weeks later and I was back at the track, this time on a dry and cool Monday. Whether it was due to the dry track or the cool air, my top speed was up to about 120. Although I’m sure it was at least partly caused by the wet track the first day, I boosted the front tire pressures by half a pound to reduce the understeer I was getting in turns 5a and 6.
Despite the relatively benign nature of these changes, none of them went all that smoothly:
- The instructions in my Helm’s manual meant getting the steering wheel off was pretty easy, once I bought the right Torx driver, and that includes dealing with the airbag. (Although reading about the highly explosive nature of the airbag made removing it a little more “sweaty-palms” than it might’ve been.) Putting my new Sparco wheel on should’ve been just as simple, except the 6 hex bolts that attach the wheel to the wheel adapter (which is what attaches to the steering column) just did not want to line up properly. Eventually, and after many colorful words, I managed to get everything together nicely. Well, almost: Because of the way the horn circuit on the Integra is wired through the airbag assembly, I couldn’t connect the horn with the button on the wheel I bought. So, no horn until I get some kind of panel in there that will support wiring in the horn.
- Ahh, the seat. As I sat down one evening with my spiffy new race seat and the hardware that would attach it to my car, it wasn’t long before I realized that I had NO IDEA how it all fit together. I mean, I’m a pretty logical guy, but I just didn’t see any way it was going to work. So, after swallowing my pride and admitting defeat, I went back to Speedware Motorsports (the local race shop where I’ve bought most of my equipment and had the bulk of my work done; Dan and Andrew have really worked to make me deals.) and asked for help. Well, it turns out it wasn’t me; the seat, seat mounts, and side rails just weren’t going to fit together. So after much head-scratching and discussion, I left the seat with them to figure out. Later that day, I picked up the whole package, featuring a now-customized seat bracket, and successfully installed it in the car that night. Unfortunately, I was now sitting really high in the car. So high, in fact, that there was no way I could wear a hat, much less a helmet. (The really weird part about this was that Dan, who’s the same height as me, and Andrew, who’s about 3 inches taller, both had more headroom than me.) So then I took the whole car back to Speedware, where they fabricated a truly customized seat mount for me. More money spent on things I never expected. (Oh, that list is getting pretty damn long.)
- Installing the pedals seems pretty easy, since all you have to do is remove the stock pedals from the pedal arms, mark where you want to attach the new pedals, put them back on the arms, drill through the marks, and then bolt the new pedals on over the original pedals. At this point, however, I just didn’t want to deal with it and let Speedware handle it while they were taking care of the seat.
- The wheels I bought for the car are great, and very reasonably priced from The Tire Rack, but they use 17mm lug nuts instead of the 19mm nuts the OE wheels use. So now I juggle 32 lug nuts every time I swap wheels….

The seat, pedals, and steering wheel as installed. 
Close-up of the customized seat mounting. 
My aluminum Kosei K-1 Racing wheels with Yokohama Advan A032R tires. 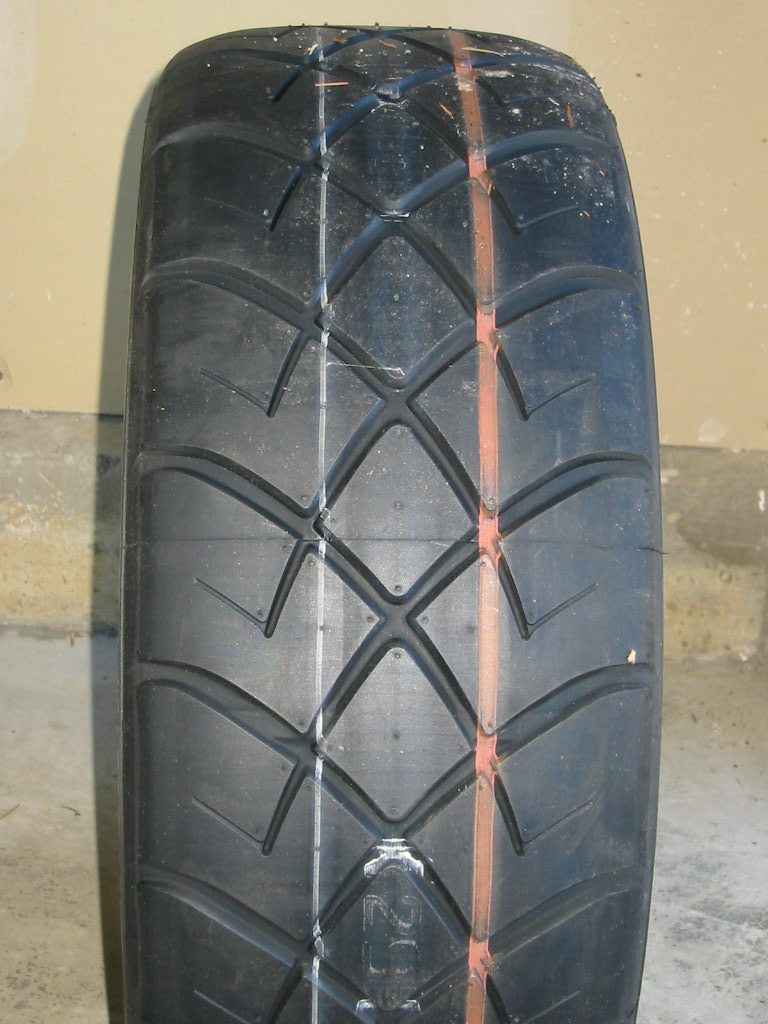
Close-up of the tread pattern on the Yokos. (Yes, I grabbed the wrong tire to make this picture work: You’re seeing the tire as it would roll towards you, rather than the more traditional shot.) 
The Integra showing off its “Round 1” changes. BIG gaps in the wheel wells with the stock suspension because of all the weight I’ve removed.
Round 2
Coming soon: Brake pads, lines, fluids, and rotors; suspension changes.
That’s what I thought I was going to do but, instead, I got a little too jazzed about starting my season and did most of the rest of the “obvious” performance upgrades. This included all the brake work I indicated was coming (except the rotors; although I’ve had them for a while, I’m not replacing the OE rotors until I’ve got time to properly break in the new ones), as well as the suspension changes, but also all the safety stuff I needed to get done, PLUS a few optional things that I basically just wanted to get over with.
The rationalization for all this work was that all of it was on my list to get done and I was remaining true to my philosophy of what to upgrade and when. The only real difference was that I moved the whole process up about 2 months: Instead of getting the car ready for a racing school in July, preparatory to a novice race in August, I was aiming for a school and first race over the same week-end in early June.
Meeting my Novice license requirements
In addition to the 3 Novice races (minimum) that must be completed before moving up to the next class of license, new drivers must work half-days at a corner station, in pre-grid, and in tech. Since I was going to be at the Conference race at Pacific Raceways anyway, I decided to get as much of this non-driving work done as possible on the 17th & 18th of May.
I started out working the corner station in Turn 8, which is quite a busy corner (last chance to outbrake someone for over a mile), learning the flags and pointing drivers off at the end of each session.
After lunch, I moved over to pre-grid for the remainder of the afternoon. Pre-grid involves directing drivers as they back into their pre-grid positions, giving them time-remaining information, ensuring that no fluids are leaked, and that all safety equipment is in place. It’s also a chance to talk with drivers you know and check out the cars up-close.
So, in order of completion, here’s what resulted from “Round 2:”
- From Cascade Autosport: TIG-welded, 6-point safety cage with anti-intrusion bars, Willans 6-point harness, and F & N mesh window net. They also relocated the ECU (the A-pillar downtube runs through its former location), tidied up the wiring in the passenger compartment, and painted the interior a spiffy, low-glare grey.
- Peter Emhoff did a stellar job of replacing the glass moonroof with a metal panel. Even though the roof is still primered (Peter’s schedule won’t allow him to apply the car’s race colors until June), it’s nearly impossible to tell there was ever anything else there. The only noticeable difference, if you know what to look for, is a slightly steeper rake to the leading 4 inches of the roof.
- From Speedware: Koni coilovers with Faulkner springs and negative camber kit, a custom-built gauge panel with Auto Meter gauges, as well as installation of my Goodridge metal-braided brake lines (too damn lazy to do it myself), AMB transponder, master cutoff switch, and fire extinguisher. They also performed a laser alignment & corner balance, and rewired the now-useless moonroof control switch so that it triggers my horn. 🙂
- I bought a “StonGard Light” kit to protect the headlights and front turn signals (no racer tape X’s on the headlights for this boy!), plus a 4×12″ strip to protect the top portion of the driver-side X-bar from my big, clumsy feet.
- Replaced the manual transmission fluid with synthetic Redline MTL. Shifts are just as nicely notchy as before, but they’re easier to make.
- From Stanford Signs: Magnetic car numbers (3 big ‘uns for the hood & doors, plus a small one for the tail) & vinyl class letters.
- Replaced the OE brake pads with Performance Friction ferro-carbon, front and rear.
Lapping day #3
…was a real bust. After a lengthy absence from the track, due to all the work I had done, I finally made it back in late May… where I discovered that my right-rear tire was severely rubbing on the fender lip in the hairpin (3b) at Pacific Raceways. Since it was still rubbing, even after I backed WAY off through that turn, the whole day had to be scrapped after only 40 minutes of driving. Hell, that’s half as long as it takes to load/unload the car and prepare for the track/street. That really, really sucks. (Oh yeah, AND I kept banging my helmet on the part of the cage that runs along the roof from the A to B pillar. Fun.)
All was not a total loss, though: High-speed turn-ins felt a lot more stable (no more body roll! yeah!) and my speed through turns 5a/5b/6 was more than 20MPH higher than it had been on Lapping day #2. Progress here, at least!
Again, check out the list of changes.

Through the rear hatch, showing most of the cage. 
The much-improved interior. Compare with the pictures from “Phase 2,” above. 
Close-up of the new gauges & repositioned ECU. 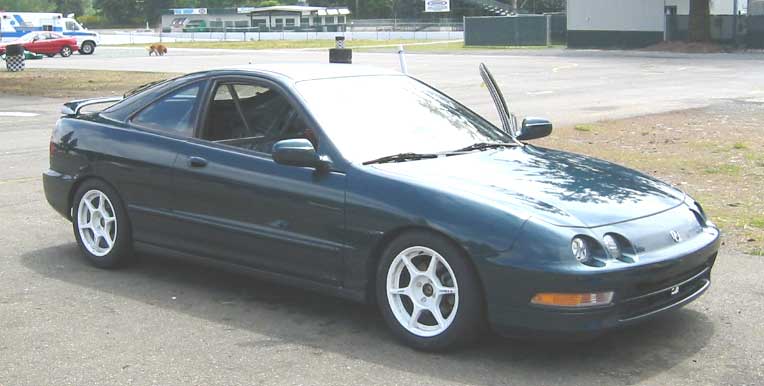
A shot I took (into the sun, unfortunately; I’ve lightened it up a bit) featuring the lowered suspension. 
The new springs and shocks, metal-braided brake line, and the transponder (left-front wheel well). 
The redone roof from above, … 
from the side, … 
and from beneath.
Lapping day #4
(And the last of the lapping-related sidebars, unless something interesting happens.)
A week after the abortive day #3, I was back with rolled fenders and new brake pads. It was also my first all-day lapping experience and, oh yeah, HOT!
Since the fender-rubbing was no longer an issue, I was able to take advantage of the new structural rigidity (’cause of the cage) and tighter suspension by really going after the high-grunt M3s, Corvettes, Mustangs, and Porsches (including one awesomely mean-sounding Carrera Turbo) that tend to populate the all-day sessions. (Not to mention a Ferrari 360 Modena with less than 250 miles on the odometer.) While, clearly, they destroyed me on the straights, there wasn’t anybody who could pull away from me on anything curvy.
Finally, and through some really rough calculations based on estimates by Garth Stein in his Spec Miata (whom I tailed for 4 or 5 laps; definitely the most fun I had all day), I’d say I was getting lap times in the 1’45” to 1’48” range. While this is 3 to 6 seconds off what I need to be competitive in both C Production and ITS, it’s nothing that some coaching and a little more seat time can’t cure.
(Update: Now that I know what some specific times feel like, I’d say Garth and I were probably running 1’49” to 1’51”.)
Round 3
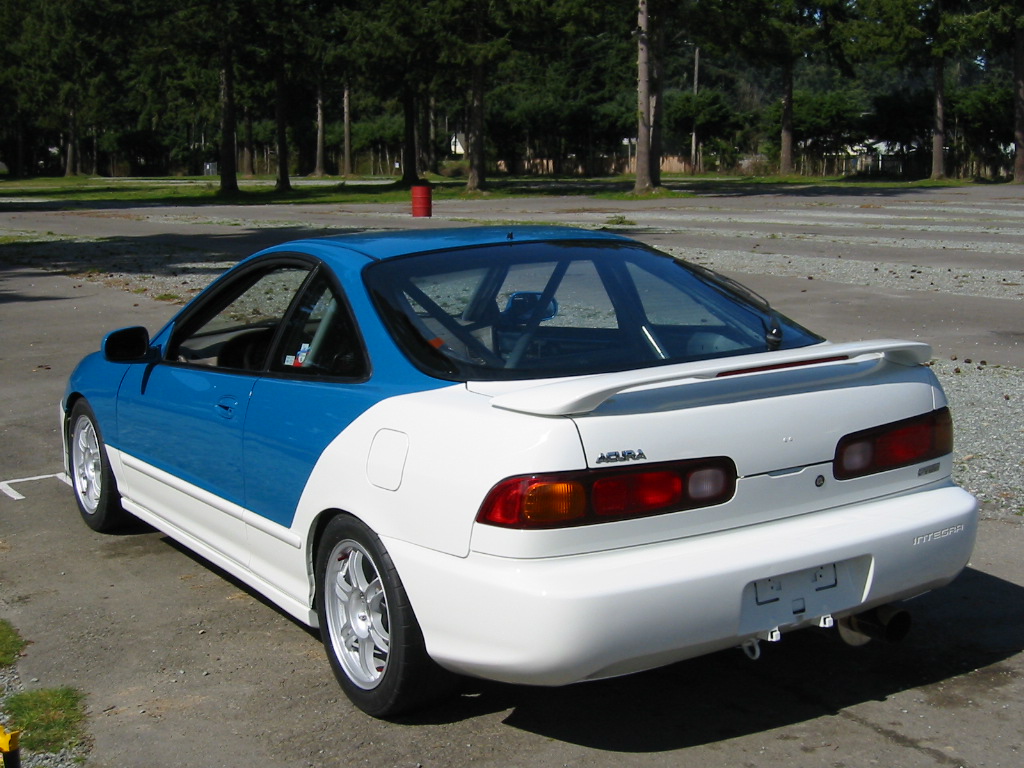
One thing I had noticed on lapping days was that my car, which seemed awfully loud revving in the driveway, was just way too quiet on the track. This was especially true when driving near cars with race exhausts, where I found myself totally unable to hear—or even feel—my engine. In addition to the hope I’d get a little more horsepower out of it, this led me to believe I needed an exhaust that was a little less polite and a little, well, louder. Not ridiculously so, mind you (I have to drive it on the street, after all), just something a little less sedate for those times when looking down to check my RPMs isn’t a good idea. Partly due to recommendations, partly due to their reputation (including putting money back into the club racing scene), I decided on a MagnaFlow cat-back exhaust featuring 2.25″ mandrel-bent pipe and a 4″ tip.
Yes, my little car now has a big ol’ exhaust, just like all the other “phat” imports. Check it, yo.
Round 4
The obvious next step after the new exhaust was to install a less-restrictive air intake, which I did in time for the last week-end of the 2003 season. Based on reputation, company philosophy, and general fit-and-finish of their products, I went with AEM’s new V2 intake and, hoo! boy did it ever make a difference:
- The first thing I noticed was that my car had somehow grown two more cylinders! Okay, maybe not, but it sure sounded more aggressive. And, really, the faster it sounds, the faster it is, yes? 🙂
- I’m not positive about this, but the ol’ “butt dyno” says that I’ve got more torque coming off the corners. High-revving 4 cylinders don’t have a lot of torque, as a rule, so any little bit helps, which might help to explain…
- A substantial increase in terminal velocity. In the past, my top speed at the end of Pacific Raceway’s front straight (braking for Turn 2) was about 120 MPH. Whether it’s more aggressive driving on my part, more torque available for accelerating out of corners, or just a better-breathing engine, I know that I was consistently hitting 130 MPH (and occasionally 132+) during the last week-end of 2003. Now that’s money well spent!
Being out in my first non-novice race really made the point that knowing what’s going on behind and to the sides is at least as important as what’s going on in front of you, so I bought a 17″ convex race mirror. While it did its intended job of removing the blind spots quite well, it also made it incredibly hard to judge relative distances. This was especially an issue looking straight back, where I found I could no longer judge just how close to my bumper a competitor might be. In the end, I decided that I’m willing to trade keeping my head on a swivel for knowing that the guy behind me is close enough to make a move.
Finally, my handy ex-Acura Master Mechanic Steve DeMar (who, although he’s usually too busy to be as much help as I’d hoped, is still willing to trade his time & expertise for beer) removed all the air-conditioning components from the car. I won’t know for sure until I’ve had the car weight balanced again, but we’re guessing it’ll save me 40-50 pounds—all of it from the already-too-heavy front end!
Round 5
The next-to-last of the major modifications I intend for the car happened in early 2004, just before the start of the new season. They included (from least to most expensive):
- Sparco hood pins which, aside from being a safety feature, allowed me to remove the front latching mechanism.
- An aggressive fire system in the form of a Phoenix 11lb Halon setup. Short of an accident that ruptures oil or fuel lines, I can’t really imagine a situation where I’d need it, but I’ll feel a little better knowing it’s there. I’m keeping the AFFF 2.5lb extinguisher in the car in case of, say, a brake fire.
- A set of Kosei K-1 TS aluminum wheels that weigh 10.6lbs each, freeing up the heavier (13.5lbs) “regular” K-1s to mount my rain tires.
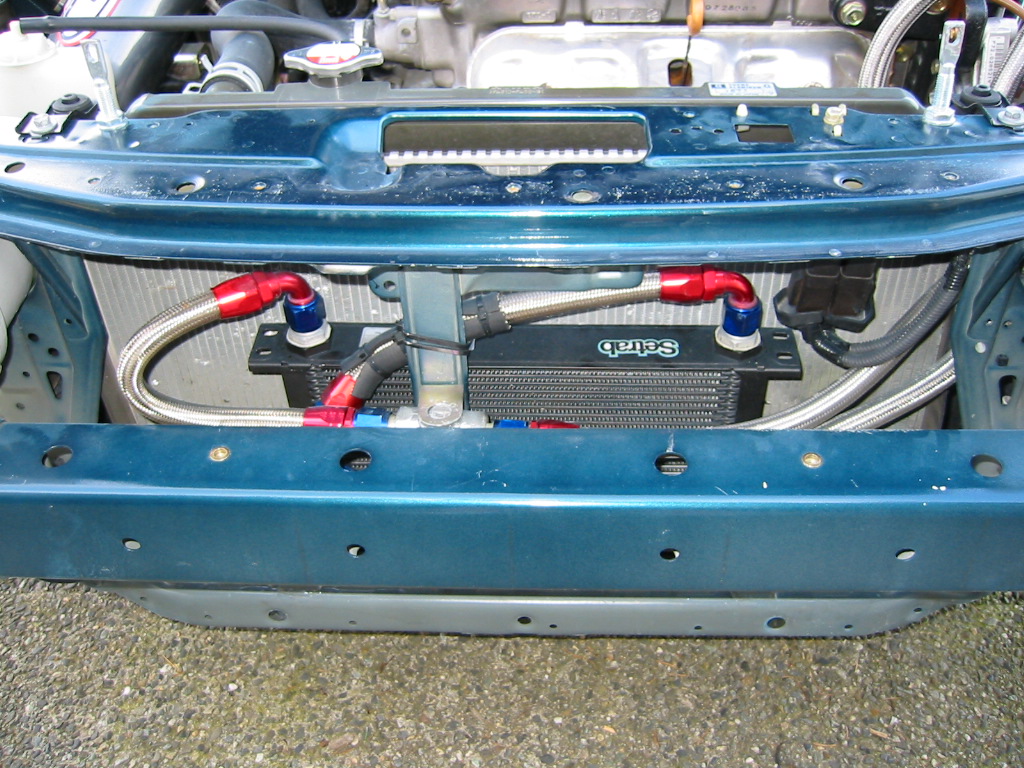
- Because any kind of ambient air temperature over 70 degrees Fahrenheit pegged my oil temperature at 250+, I had a Setrab 17-row oil cooler installed, along with a remote oil filter and all the attendant metal-braided hoses. The cooler itself is in a rather vulnerable position (see picture), but there really isn’t anywhere else to put it without spending even more money than I did already.
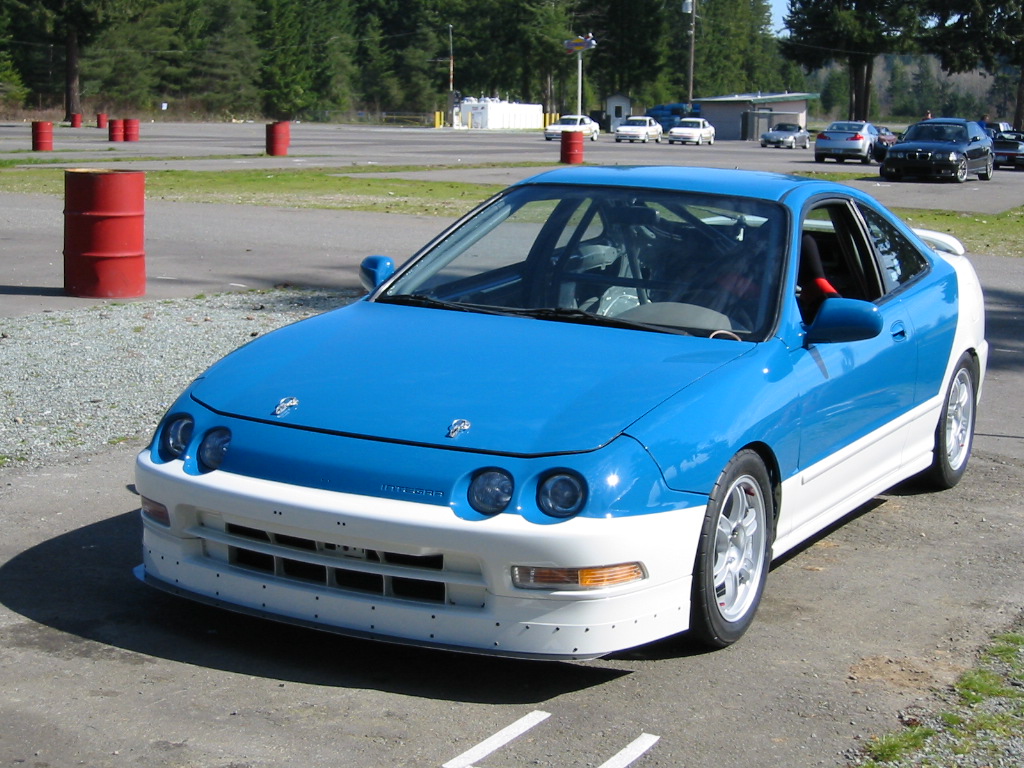
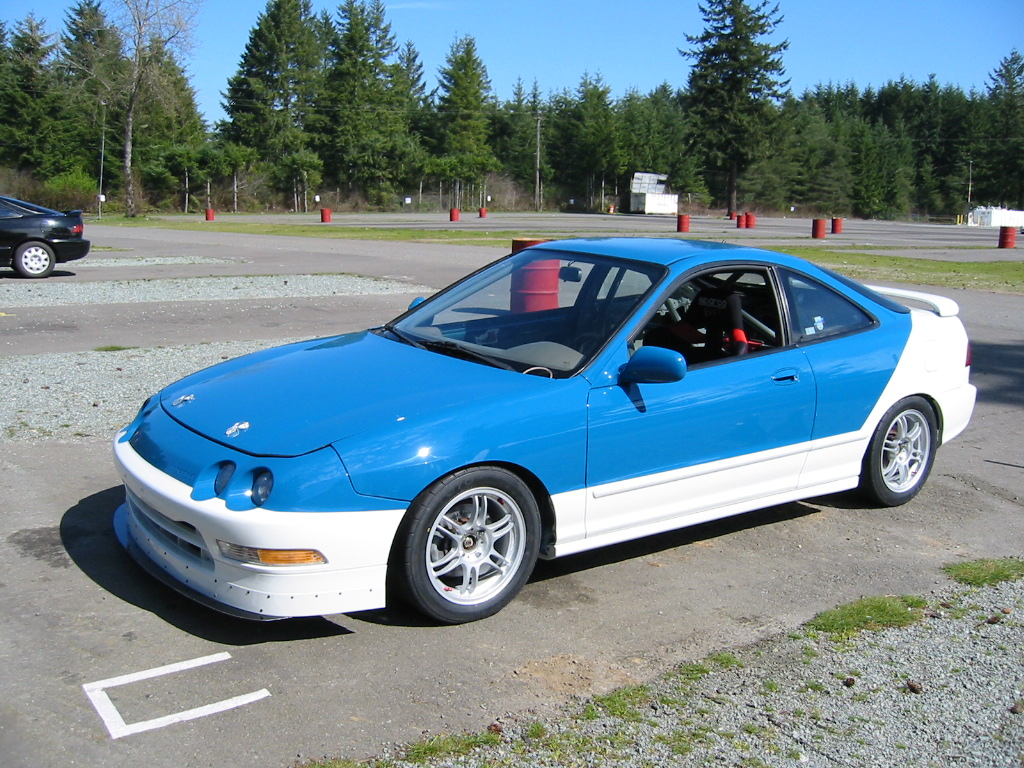
- The “racy” paint job I intended to do last year, until I found out how much it was gonna cost. It was inspired by Eric Krause‘s Porsche 968 (which he’s since had painted differently) and is sort-of-but-not-really based on the paint scheme used by RealTime Racing on their Integras and RSXs/TSXs. (Yes, I really did spend most of my off-season money on paint. Kinda silly, I know, but the original color wasn’t the best for visibility, plus I just got tired of it looking like I stole my mom’s car to go racing.)
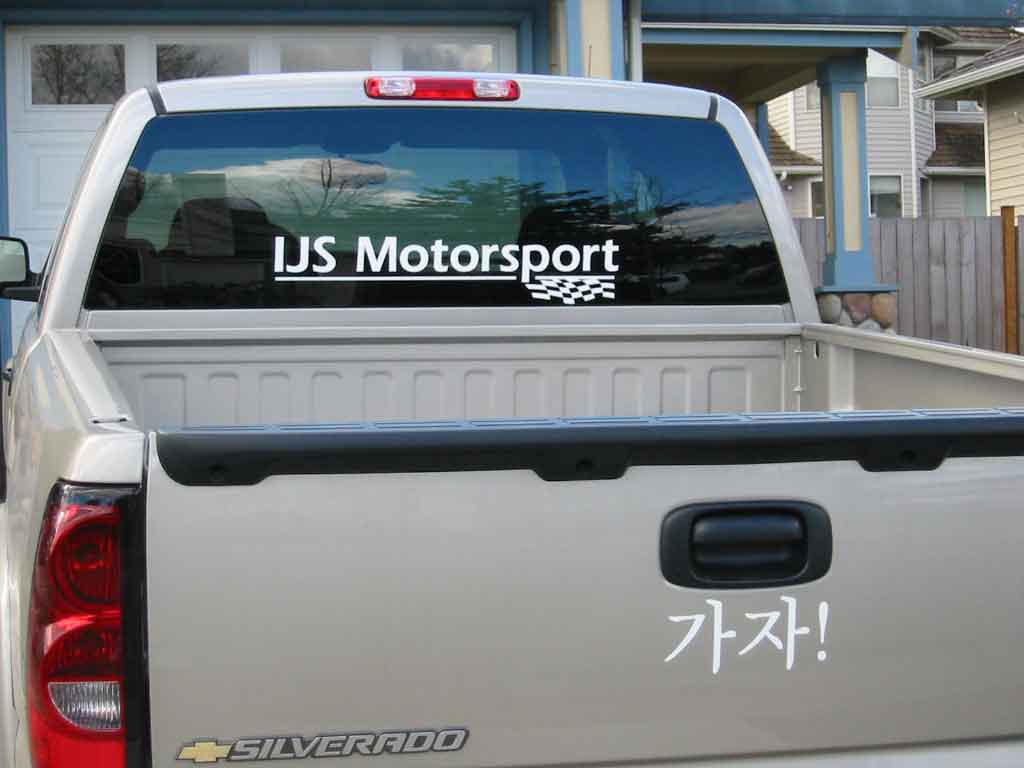
Between getting the car repainted and (finally) getting my International Road Race (“senior”) license and a sort-of permanent number, I needed to get a whole new set of vinyl decals for the car. While I was at it, I spent some more money semi-foolishly (see paint, above) and bought some vinyl for the truck and trailer, too: Big [Ed.: former team name] “IJS Motorsport” banners for the trailer and a smaller one for the truck.
I also needed a new set of tires for the new season, so I decided to try the tire configuration pretty much everybody I race with recommended, namely a set of Toyo RA-1 DOT-approved race radials, shaved to 4/32s of an inch. (No, I don’t know why people say “4/32” instead of “1/8,” either.) They’re also lighter than the Yokohamas I ran last year, which is part of the good news. The bad news, unfortunately, is that I use the exact same tire size (205/50-15) as that mandated for pretty much every Spec Miata racer in the country, pro as well as amateur, which means I’ll always be competing with the “wreck Miata” crowd to obtain this popular tire. (I’ve also replaced the Yokohamas with full-depth RA-1s, which I’ve been told make for a solid rain tire.)

